Skip to content
The beaver is a proud and noble animal

The beaver is a proud and noble animal

Notes from a bemused canuck

  • Home
  • About
  • Bookmarks
  • Pictures
  • Resume
  • Wine
  • Random Recipe
  • Toggle search form

Tag: recipes

[Recipe] Lonzino – dry cured pork loin

Posted on May 22, 2012 By admin

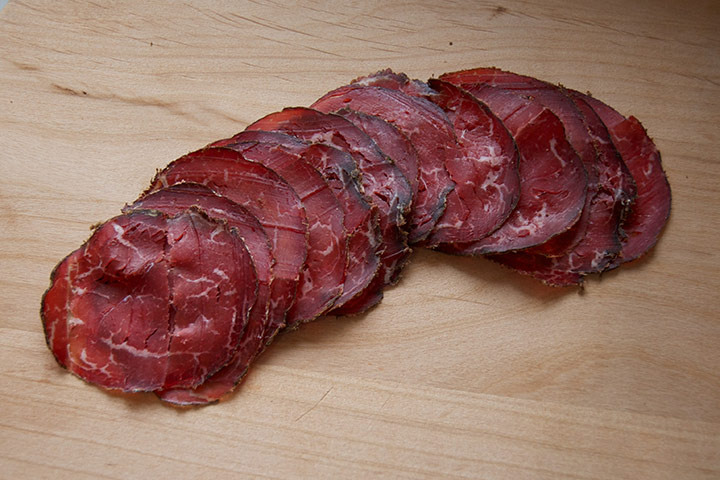
Lonzino is a section of pork loin that has been cured then air dried. A very simple whole muscle cure that has a wonderful tenderness to it, with clean pronounced flavors, possibly thanks to the low amount of fat in each slice. It is pretty much the pork version of bresaola.

Ingredients

NOTE: Cure ingredients are given here as percentage of the total meat weight, after trimming.
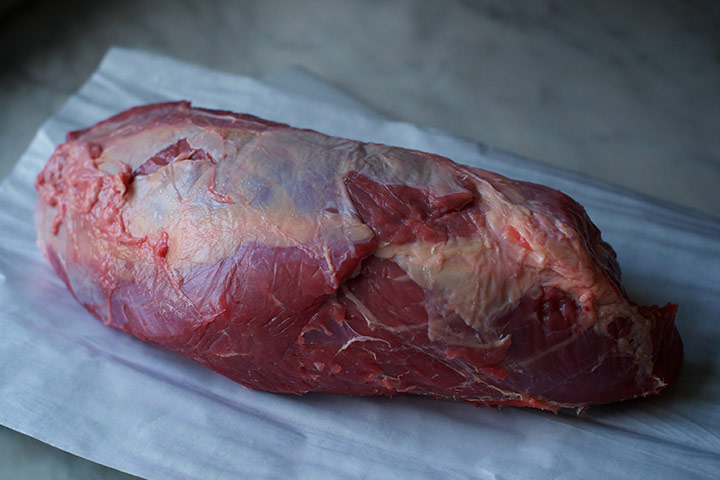
Pork loin – 1082g
Kosher Salt – 36g (3.3%)
Black Pepper 10.8g (1%)
Cane sugar 10.8g (1%)
Cure #2 2.7g (0.25%)
Juniper Berry 1.6g (0.15%)
Fennel Seed 3g (0.27%)
Dried Bay Leaf – 0.4g – about 2 leaves

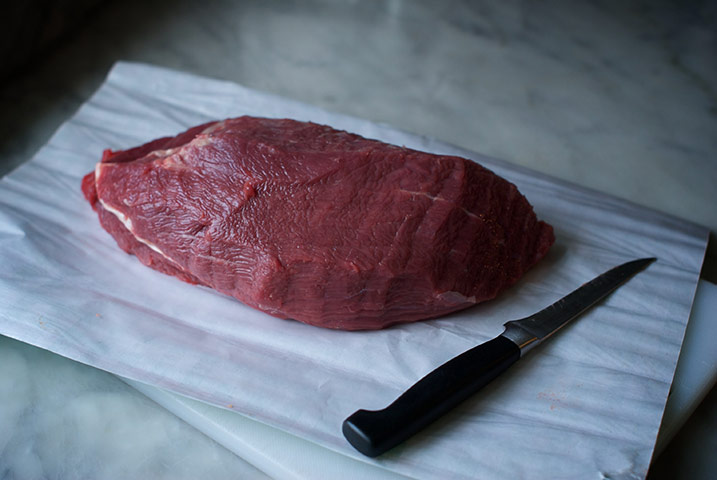
Trim away any nasty looking stuff from the meat – blood spots and so on. Wash gently, dry well. When trimming this thing up I thought it would be rather lovely to leave a little fat on it, just to help give a silkier mouth-feel. That turned out to be a good plan. The actual muscle is pretty lean, and the fat certainly helps to give a good texture and flavor balance.

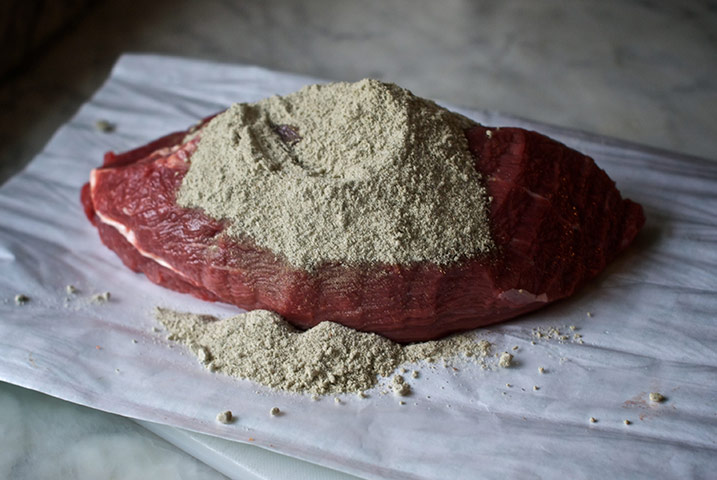
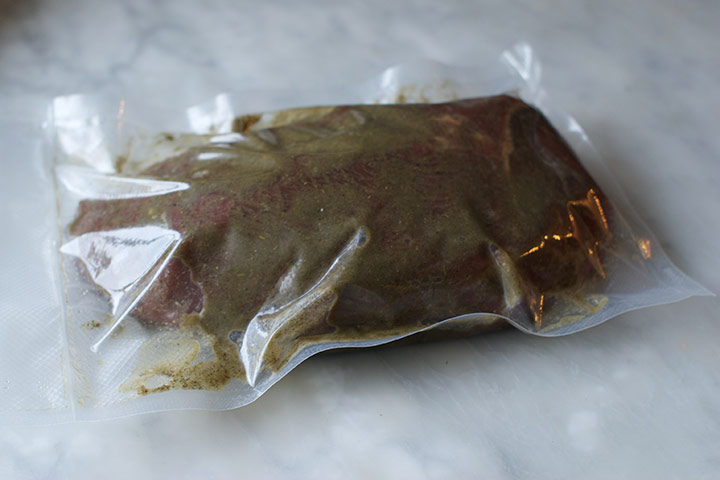
Grind up all the cure ingredients in a spice grinder until finely ground. Put the meat in a large zip lock bag, and rub the cure all over. Seal the bag, and put in the fridge for 10 days. Every couple of days rub the meat through the back, helping to distribute the cure well.

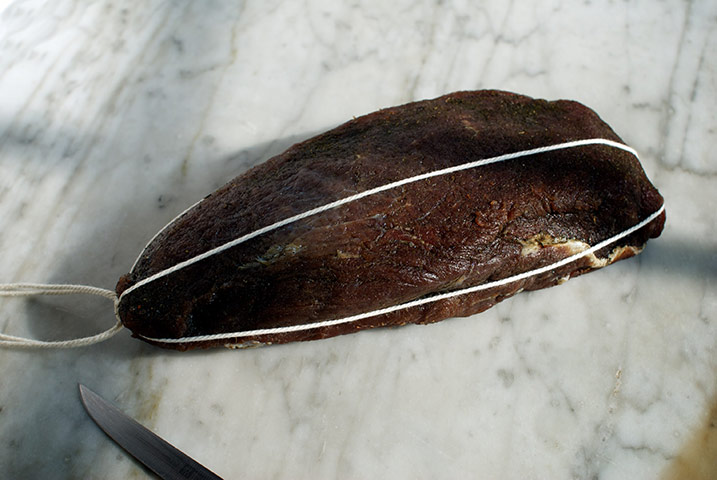
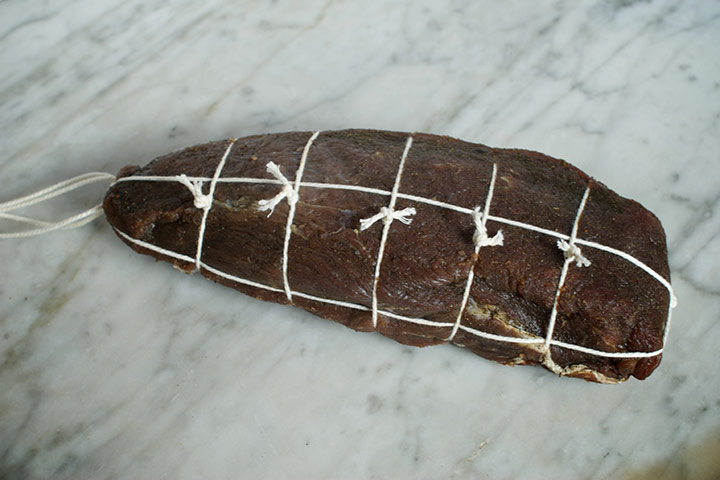
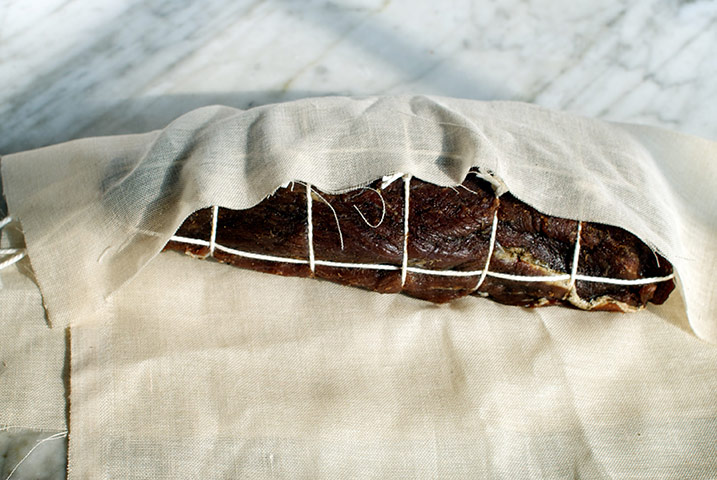
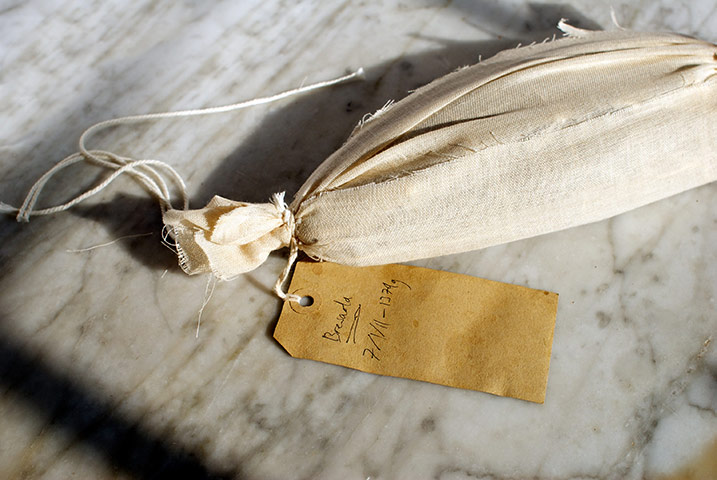
Wrap in muslin and tie the meat up, using butchers loops and knots, much the same way you would tie a roast.

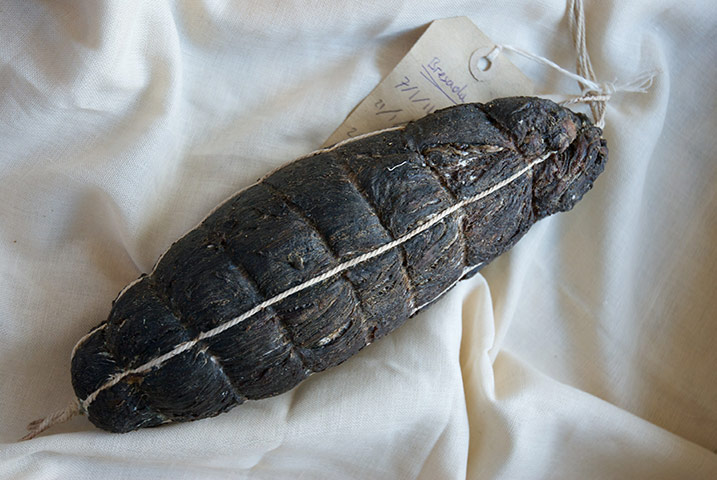
Hang to air dry at 55F, 75% humidity with gentle airflow for about a month – until the meat has lost 35% of its weight.

Slice thinly to serve.

uncategorized

[Recipe] Tourtière du Lac St-Jean

Posted on May 10, 2012May 10, 2012 By admin

Ingredients

1.3 kg cubed venison
1.2 kg cubed pork (or boar)
500g rabbit loins
2 large red onions, chopped
1 teaspoon white pepepr
1/2 teaspoon rosemary
1 teaspoon thyme
2 bay leaves
10 allspice berries, crushed
10 cloves, crushed
1 teaspoon cinnamon
750 ml still cider
8 or 9 medium potatoes, peeled and cubed
3 portions of shortcrust dough (see below)
1 cup chicken stock (or more, if required)
salt to taste

Method

Marinade the cubed meat with all of the ingredients (except potatoes, salt and stock) for 24 hours.

Soak cubed potatoes in cold water for at least 1h.

While potatoes are soaking, prepare 3 portions of dough and combine in two balls, one large (2/3) and one small (1/3). Wrap in cling film and chill for 1h.

Pre-heat oven to 375F/190C.

Roll out the large dough ball and cover the bottom of a large high-walled, lidded, oven-proof dish.

Add 1/3 of meat mix, some salt and half the potatoes. Repeat alternating meat and potatoes. Pour the marinade over the mix.

Roll out the small dough ball and cover the tourtière, crimping firmly the two layers of pastry. Cut small slits in the top pastry and make a large hole in the middle to let steam out (the chimney).

Pour stock through the chimney until it reaches the top of the meat layer but doesn’t touch the pastry top.

Cook uncovered for 30 minutes then lower the oven to 250F/125C and cook for 4.5 hours (occasionally checking the stock level through the chimney and topping up if low).

Remove lid and cook uncovered for 1h until top is golden.

Shortcrust pastry

1.5 cups all purpose flour
1/2 teaspoon salt
115g unsalted butter, very cold, cubed
75ml water, very cold

Put flour. salt and butter in food processor and blitz for 10 seconds.
Add water and pulse until the mix becomes lumpy. Do not pusle until it becomes a big ball.
Dump mix out and hand form it into a flattened ball.
Wrap in cling film and chill at least 1h before using.

uncategorized

[Recipe] Tourtière

Posted on May 10, 2012 By admin

Ingredients

2 1/2 pounds ground pork, ideally organic & local
1 1/2 cups cold water
1 cup finely chopped onion
1/2 cup finely chopped celery
1 teaspoon ground black pepper
2 bay leaves
1/2 teaspoon dried thyme
1/2 teaspoon dried rosemary
1/2 teaspoon grated nutmeg
1/2 teaspoon cinnamon
Salt
1/2 cup old-fashioned rolled oats
Pastry for two double-crust, 9-inch pies
1 egg, beaten, for glaze

1. In a large, heavy frying pan, combine pork with cold water and heat to boiling point. It should be slightly soupy.

2. Add onion, celery, pepper, bay leaf, thyme, rosemary, nutmeg and cinnamon. Cook, covered, over medium-low heat for 1 hours; stir often. Add more water if mixture dries out.

3. Halfway through cooking time, season with salt to taste.

4. Stir in rolled oats and cook, stirring, for 1 to 2 minutes. Remove bay leaf and allow to cool.

5. Meanwhile, line two 9-inch pie plates with pastry. When meat mixture is lukewarm, divide it between two pie shells and spread it out evenly.

6. Brush around outer edge of pastry with the beaten egg. Place top crust on the tart and press gently around the edge to seal. Trim pastry, crimp edges and cut steam vents in top crust. Decorate as desired.

7. Bake in preheated 425°F/220°C oven for 15 minutes, then reduce heat to 375°F/190°C and bake another 25 minutes or until crust is golden.

Makes two 9-inch meat pies.

Make ahead

Is there any point in making just one meat pie? Not really. They freeze beautifully; whether pre-cooked or frozen with raw pastry dough, which ensures that you can get a hot, filling meal during the busy days ahead. Pies can be frozen directly after assembly, with the dough still raw. Wrap them well in plastic wrap and freeze.

To cook:

Remove pie from the freezer and unwrap.
Brush the top with a little beaten egg and place frozen meat pie in a preheated 375°F/190°C oven.
Bake until golden and heated through, about 50 minutes.

Pies can also be baked and cooled, then wrapped and frozen.

uncategorized

[Recipe] Michel Roux Snr’s Lemon Tart

Posted on May 10, 2012 By admin

Serves 8

Prep 25 mins
Cook 1 hr plus chilling

Ingredients

Pastry (makes double)
500g plain flour , plus extra for dusting
140g icing sugar
250g unsalted butter , cubed
4 egg yolks

Filling
5 eggs
140g caster sugar
150ml double cream
juice 2-3 lemon (about 100ml/3.5fl oz)
and 2 tbsp lemon zest

Method

1. To make the pastry, mix the flour and icing sugar in a bowl. Rub the butter into the flour with your fingers until crumbly. Mix in the egg yolks. If the pastry is still too dry, add 1-2 tbsp water until it comes together. Roll into a ball and divide in half (freeze one half for another recipe). Flatten out the pastry with your hands, wrap the dough in cling film, then chill for at least 30 mins. While the pastry is chilling, make the filling. Beat all the ingredients, except for the zest, together. Sieve the mixture, then stir in the zest.

2. Roll out the pastry on a lightly floured surface to about the thickness of a £1 coin, then lift into a 23cm tart tin. Press down gently on the bottom and sides, then trim off any excess pastry. Stab a few holes in the bottom with a fork and put back in the fridge for 30 mins.

3. Heat oven to 160C/140C fan/gas 3. Line the tart with foil and fill with rice or dried beans. Bake for 10 mins, then remove the tart tin from the oven, discard the foil, and bake for another 20 mins until biscuity. When the pastry is ready, remove it from the oven, pour in the lemon mixture and bake again for 30-35 mins until just set. Leave to cool, then remove the tart from the tin and serve at room temperature or chilled.

Notes:

  • The quantity of pastry given is about double the amount that you’ll need because if I’m going to the effort of making my own pastry, I always make double and freeze half for next time. If you don’t want to freeze some, simply halve the pastry quantities.
  • To make this tart even more decadent, whip some whipping cream with icing sugar and a bit of lemon juice, then fold in a sheet of soaked leaf gelatine. Top generously and leave to set.
uncategorized

[Recipe] Oven-baked calamari

Posted on May 10, 2012 By admin

Ingredients

Cooking spray
1 pound calamari, tubes and tentacles
1 1/2 cups panko bread crumbs
1/2 cup white tortilla chip pieces (2 inch pieces)
1 1/4 cups low-fat buttermilk
1/2 cup plus 2 tablespoons all-purpose flour
1/4 teaspoon ground black pepper

Method

Preheat oven to 200oC. Coat two large baking sheets with cooking spray.

Pat calamari dry with a paper towel. Cut tubes crosswise into 1/2-inch thick rings (do not cut tentacles). Set aside.

Combine panko and tortilla chips in a food processor and process until finely ground. Transfer mixture to a bowl.

In a separate bowl, whisk together buttermilk, 2 tablespoons of the flour and black pepper. Place remaining 1/2 cup of flour in a large freezer bag.

Add calamari rings and tentacles to the bag with the flour and shake to coat. Working in batches, dip the flour-coated calamari into buttermilk mixture and then into panko mixture. Arrange calamari, in a single layer, on prepared baking sheets. Spray the surface with cooking spray.

Bake 15-20 minutes, until calamari is tender and coating is crisp and golden brown.

Serves 4

Serve with lemon wedges and warm tomato sauce/salsa on the side for dunking.

uncategorized

[Recipe] How to make infused vodka

Posted on April 27, 2012 By admin

Infused spirits are a great way to get flavor without bulk. The substance that gives herbs and spices their flavor is referred to as the “essential oil,” an apt term that reflects the similarity of these flavorful substances to fats. Like fats, essential oils don’t dissolve readily in water so the most flavorful infusions can be made in fat—or its more drinkable molecular relative, alcohol.

Some of those compounds that produce a plant’s characteristic flavor are agents of chemical defense that have repellent or disruptive effects on attackers and, unless contained, can foul up the inner workings of the plant itself. For this reason, many of the prized aromatic compounds are isolated in special storage cells. That’s why herbs and citrus peels release a burst of aroma when you crush them between your fingers: You’re breaking open said storage cells. To maximize flavor in vodka infusions, run the ingredients through the blender briefly to release flavorful and aromatic compounds from their freshly broken storage cells.

Vodka has very little flavor of its own, so it makes a great neutral solvent. I like to infuse it with citrus peels left over from juicing or end-of-summer garden herbs, but the possibilities are endless. Raid your fridge, cupboards and spice racks for inspiration. Mix and match with simple syrup, sparkling water, juices, and fancy garnishes for easier-than-they-seem party cocktails.

Step 1 PROCURE FRUIT

Citrus-infused vodkas are simple, classic, and easily put together from fruit peels left over from eating or juicing. I try to buy organic produce to minimize the possibility of pesticide residue in my cocktails.

Step 2 WASH IT

When using citrus peels, I wash them thoroughly because I’ve seen my share of mangy toddlers in the produce aisle with their sticky mitts all over the fruit.

Step 3 PEEL IT

Using a sharp vegetable peeler is the easiest way to separate the flavorful yellow zest from the bitter white pith.

Step 4 WEIGH IT

5% by weight is enough citrus peel or herb to infuse plenty of flavor. A 750 ml bottle of vodka weighs 690 to 700 grams, so if you want to infuse the whole bottle, use 35 grams of zest. For rogue cooks or those without kitchen scales, one very large lemon, one small orange, or half a grapefruit will yield 35 grams of zest.

Step 5 BLANCH IT

Blanch the strips of zest in boiling water for 30 seconds to tame bitterness.

Step 6 ADD ZESTS

Pour the zests in a strainer over a sink and shake off remaining water. If you’re using herbs in your infusion, in this step you’ll want to dry them more thoroughly to avoid diluting the vodka. Rinse the blanched herbs quickly in cold water, then carefully wring them out.

Step 7 ADD VODKA

Put the zest in the blender. Add the vodka. Save the bottle for storing the finished infusion.

Step 8 BLEND IT

Blend. This increases the surface area of the lemon zest, exposing more of it to the vodka, and busts open the cells in which the essential oils are stored—yielding a stronger infusion in less time. Follow the same procedure for herbs. There’s no need to liquefy the mixture; just blend for 20-30 seconds to break the zest into small pieces.

Step 9 POUR IT

Pour the vodka and zest into a wide-mouthed jar. If some bits of zest are stuck under the blade, pour a small amount of vodka back into the pitcher, swirl it, and pour it quickly back into the jar.

Step 10 STORE IT

Screw on the lid and stash the jar someplace dark for four days or so. Herbs should be strained on the fourth day; I noticed that they picked up off flavors if left in longer. Citrus peel was less finicky and had sufficient flavor and bright color after four days.

Step 11 POUR IT

When it’s time to strain, set a funnel inside the vodka bottle and line it with a coffee filter. Pour the vodka into the funnel slowly, being careful that it doesn’t breach the filter.

Step 12 FILTER IT

The coffee filter will catch solid bits as the bottle collects the crystal-clear infusion.

Step 13 MIX AND DRINK

Unlike commercially infused vodka, homemade infusions naturally pick up color from the fruit. Mix up some lemon peel-infused vodka with simple syrup and sparkling water for an easy “Limoncello” soda.

Original Link and pictures: http://www.americastestkitchenfeed.com/do-it-yourself/2011/06/how-to-make-infused-vodka/

uncategorized

[Recipe] Home-cured braseolea

Posted on April 24, 2012May 22, 2012 By admin 1 Comment on [Recipe] Home-cured braseolea

Bresaola is salted and dried just like a salami but it’s made from a single muscle of beef. This means that, though the surface might develop a healthy bloom of mould while it dries, the inside of the meat is never exposed to the air making any kind of bacterial development much less likely.

There’s a common belief that we don’t “do charcuterie” in this country because our humid climate makes meat go off rather than dry; that’s a complete myth. You actually need a cool, moist environment for curing, preferably with a decent breeze. If a sausage or piece of meat dries quickly in dry air the outside becomes hard too quickly, preventing the moisture from escaping from the centre. In moist air the outer surface remains pliable as the meat dries evenly throughout. Most of the best charcuterie in the world is cured in moist temperate climates, often in mountains or where a good clean sea-breeze can promote drying through evaporation.

This is obviously not an accurate description of conditions where I live in Camden Town but I’ve had great success drying meat in my kitchen, hanging close to a north facing window for maximum chill and breeze through the knackered sashes. I also tend to hang over the sink to keep the humidity up. If things get too hot I move things to the shade. In fact the more you can keep an eye on your meat, checking it daily, the better result you’re likely to get.

Many home curers starting out get jumpy when mould appears. Actually a chalk-white bloom on the surface is healthy and any spots of slimy or black mould can be spotted and quickly removed with plain vinegar – one good reason for a daily check. The best reassurance, though, is a good deep sniff. If your meat is going off you’ll definitely know by the smell in fact, in Italy this is still considered the only sure way to check. Testers use a long needle made from horse bone which can be slid into the ham or salami and sniffed to ensure there’s no trace of putrescence.

Have a go at a bresaola before the weather gets too hot (there’s a step by step picture gallery here). The cut of meat is cheap, the process simple and if you start now then by late June you’ll be smugly picnicking under the bougainvillea on your own charcuterie.

1. Ask your butcher for the main muscle in the top round. This is from the top of the leg, usually regarded as a second class roast but excellently lean and close textured for our purposes

2. Trim off all the surface fat and silverskin. Be merciless, it all makes for great stock. Don’t try to remove the single vein of silverskin running through the centre of the muscle – your meat will fall apart if you do.

3. Make up your dry cure from 100g of coarse salt, 100g of sugar, 5g black pepper and 5g of Prague Powder #2. (easily available online here). You can go off piste with the aromatics if you like but I favour the traditional rosemary and juniper. Put the lot through the grinder and reserve half the cure in an airtight jar.

4. Rub half the cure into the surface of the meat and seal it into a freezer bag. Place the meat in the fridge and allow to marinate, turning daily. After a week, take the meat out of the bag, dry it with a paper towel and then rub with the second half of the cure. Reseal and marinate for a second week.

6. Remove any remaining cure and pat dry with paper towels. Tie two pieces of string vertically around the meat then tie a series of butchers knots horizontally around and wrap in clean muslin.

7. Label clearly with date and weight and hang in a cool place, not too dry. Check regularly by taking a good deep sniff for unpleasantness and weighing carefully. Your bresaola will be ready after around three weeks when it’s lost 30% of its weight.

8. I usually remove the muslin for the last week of drying. If there’s a great deal of mould on the surface I wash it off with a clean piece of muslin soaked in vinegar.

9. Slice paper thin and serve as it comes or with with a little olive oil and lemon juice.


All images:

Original source: Tim Hayward for the Guardian

Alternate recipe from Len Poli

uncategorized

[Recipe] Instant coffee uses you wouldn’t believe

Posted on February 20, 2012 By admin

I saw a blog post on the Food Network website about using instant coffee powder in unusual ways. I tried one of them last night, and in one word, GODDAMN!!!

Combine instant coffee with salt, cumin, ground black pepper and whatever else gets you going. Grind it up and use as a rub on steaks or beef roasts.

I had some nice sirloin defrosting, and I tried the rub as suggested. BEST STEAK EVAR!!!!!

The website also mentions adding instant coffee to chili and other tomato-based stews and sauces to give a nice depth of flavour. I’ll have to try that next time I’m doing pasta sauce or chili.

uncategorized

[Recipe] Cheesy Jalapeno Pull Bread

Posted on February 9, 2012 By admin

Ingredients

1 rustic loaf of bread, unsliced, either Italian or French
350g strong cheese (mix of stilton, cheddar, gouda, etc)
250g cooked chicken breast
1/4 cup (less or more to taste) pickled jalapeños
1/4 cup (less or more to taste) olives
1/4 cup chopped green onions, including greens
50g butter

Method

  1. Preheat the oven to 350°F/16°0C. Slice the bread almost all the way through (not all the way) in a cross hatch pattern, spacing an inch between the slices.
  2. Use a food processor to blitz all the ingredients together and make into a paste.
  3. Place the bread on a large sheet of aluminum foil (large enough to wrap the bread) on a baking sheet. Stuff every crevasse with the mixture. Wrap with the aluminum foil. At this point you can make ahead and refrigerate until ready to bake.
  4. Place in the oven for 15 minutes. Then uncover the foil from the bread and cook for 10 minutes more, until all of the cheese has melted.
  5. Place on a serving board or plate to serve.
uncategorized

[Recipe] Low and Slow Oven-Baked Pulled Pork

Posted on January 3, 2012January 3, 2012 By admin

For the Rub:
1 tbsp kosher salt
1 1/2 packed tbsp brown sugar
2 tsp smoked paprika
1 1/2 tsp freshly cracked black pepper
1 tsp onion powder
1 tsp mustard powder (Coleman’s preferably)

1 (5 to 6 lb) bone-in pork shoulder roast
flavourless oil, such as canola or safflower
1 bottle of your favourite BBQ sauce, plus extra for serving
1/3 cup apple cider vinegar, plus extra for seasoning
kosher salt and freshly cracked black pepper, as needed

Add all ingredients for the rub to a small bowl. Whisk to thoroughly mix. Evenly coat the pork shoulder with the rub, massaging the seasonings into the meat. Wrap the seasoned pork tightly in plastic wrap. Place in the fridge and let marinate for 2-6 hours.

Preheat oven to 275F/135C degrees.

Remove seasoned pork from fridge and let sit at room temperature for about 1 hour.

Coat the pork roast with oil and place into a glass or ceramic baking dish, fat-side up. If you have one, insert a digital meat thermometer into the middle of the roast and set the alarm for 190 degrees. Do not let the thermometer touch any bones.

Place the roast into the preheated oven. Roast for 6-7 hours, basting with pan juices every hour or so, until the meat has reached an internal temperature of 190 to 200 degrees and is fork tender. Remove from oven, place the roast on a platter and loosely cover with foil. Let the roast rest for 1 hour before shredding.

Once the pork has been removed from the baking dish, pour all of the pan juices (aka jus) into a small container. Place the jus into the fridge to chill. (Chilling the jus will help all of the fat rise to the top and solidify so it is more easily removed!)

After the pork has rested, use your hands or two forks to shred into chunks. At this stage you can either finish the preparation for immediate consumption or place the pork into an airtight contain and refrigerator for 1 day until ready to eat.

Place the pulled pork into a pot and place over medium low heat. Remove the jus from the fridge. Using a spoon, scrape off the solidified fat and discard or save for another use. Add the jus, bottle of BBQ sauce and apple cider vinegar to the pot with the pork. Stir to thoroughly coat all pork with sauce. Heat until pork has absorbed most of the sauce and is heated through. Taste and adjust season as desired with kosher salt, freshly cracked black pepper and more cider vinegar or BBQ sauce. Serve with on Kaiser rolls with coleslaw and extra BBQ sauce or hot sauce as condiments. Enjoy!

uncategorized

Posts pagination

Previous 1 … 41 42 43 … 49 Next

Power to the beaver!

Show me the beaver!
June 2026
M T W T F S S
1234567
891011121314
15161718192021
22232425262728
2930  
« May    

Quote of the day

Five exclamation marks, the sure sign of an insane mind.
--(Terry Pratchett, Reaper Man)

Random Posts

  • Brain meltdown
  • This, for the last two weeks
  • Today is a day for weird news!
  • [recipe] French onion beef noodle soup
  • Oldie, but goodie
reading leopard

Tags

bobble the little blue owl boobies brought to you by the fda cats chonk christmas comics computers are evil covid-19 dealing with idiots dilbert dog ducks galleries geek god bless the land of the free holidays house I am Canadian land of cheese and chocolate linked news lolcat london news from the stupid not my dog nsfw pets pictures potd2014 qotd random shit re-member recipes relationship shrill slice of life stress Tao the british way The Peanut things i miss travel video wine work

Archives

Meta

  • Log in
  • Entries feed
  • Comments feed
  • WordPress.org

Copyright © 2026 The beaver is a proud and noble animal.

Powered by PressBook Premium theme

Loading Comments...